
Generative Art with Grasshopper3D (Visual Programming)
- Ramiro Sena

- Jan 30, 2021
- 3 min read
Hey guys! I am an architect from Argentina creating Generative Art among other things. Today we are going to use Grasshopper3D to create some art! If you wish you can find me on Instagram.
Requirements:
Grasshopper3D is an amazing tool that comes with Rhinoceros3D. It was a pioneer in Visual Programming, which basically enables the user to graphically manipulate program elements rather than specifying them textually.
Summary:
Create a grid of points
Compute values to move points
Move points in the Y direction
Interpolate points to generate curves
Bake and export to Adobe Illustrator
Alright, let's get right into it!
We are going to start by creating a squared grid of points.
To do this I first create a square of 100 x 100 units, make a surface out of it and finally divide the surface to have my grid of points. (The actual units do not matter as we will then be exporting to Adobe Illustrator and scaling our drawing to 1080 x 1080 pixels or whatever you want it to be.

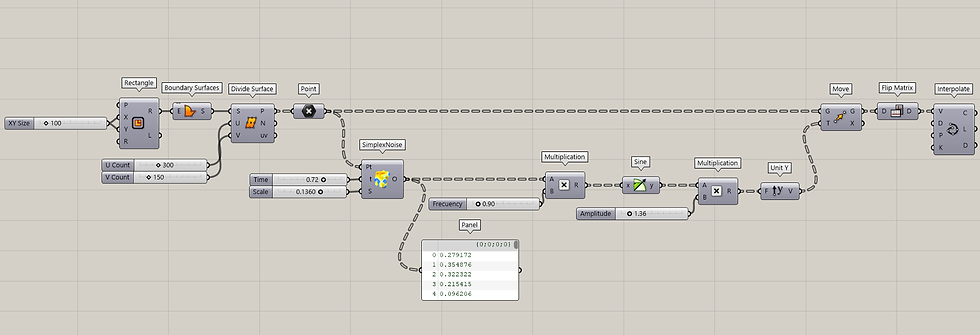
Then we will use SimplexNoise component together with the Sine component to generate values that will become our amplitudes to move the points in the Y direction. We can see the actual numbers with the Panel component. We will then multiply these by a factor to control our frequency, compute the Sine of these values and then multiply by another factor to control our amplitude. Like so:

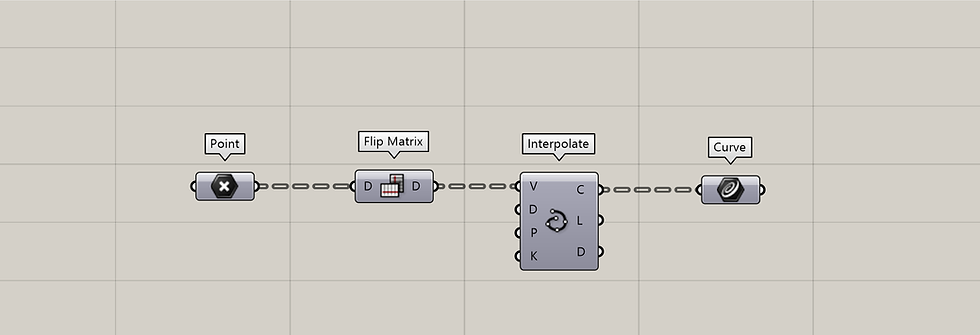
Finally, we will interpolate these moved points to generate our curves. We have to make use of a Data Tree managing component called Flip Matrix. In simple words, what this does is change the orientation of how our grid of points is structured from vertical to horizontal. You can try interpolating the points directly without the Flip Matrix component and see how the resulting curves will connect points vertically rather than horizontally. Data Trees are a whole subject in GH, more on them here.
Okay, that was it!
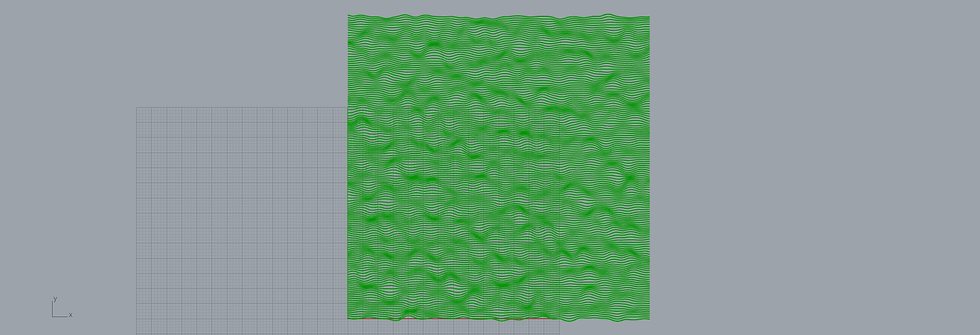
The final definition should look like this and the result below:
Baking and Exporting
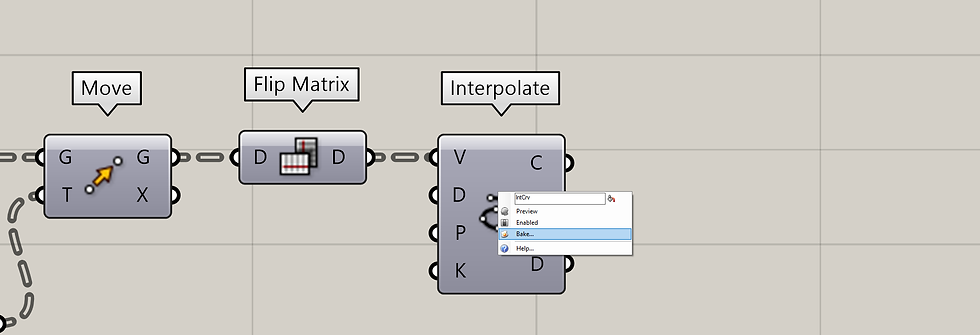
Baking means creating the geometry displayed by GH in green into actual geometry in the Rhino workspace. We do this by right-clicking on a component and choosing bake. We can now select the curves and choose File>Export Selected or simply type Export in the Rhino command-line. In the dialog choose to save as Adobe Illustrator (.ai). That's it! You can now open your vectorial art inside Illustrator and scale it as you wish!
Experimenting with Variations
The beauty of Grasshopper is that we can experiment with the values of the sliders, or even try new connections and instantly visualize the results:
For example, if we deconstruct our grid points into their X, Y, Z values, we can take the X value and add it to our Noise values like so before multiplying. Notice how the results change:
In light blue the added components and below the final result:


Getting Picky
Now, suppose we want the amplitude to vary according to Y axis of each point. Let's say, the higher the Y value, the lower the amplitude. This will create almost straight lines at the top and more wavy lines at the bottom. I know what you are thinking: uff...this will be hard.
Surprisingly, it is very easy! We can easily achieve this by multiplying the amplitude values of our grid points at the top by 0 and the ones at the bottom by 1. The ones that get multiplied by 0 mean there is no moving in Y axis, so the results will be straight lines.
We will use the Y values of all of our points and remap them to a domain of 1 to 0. So counting bottom-up the most lower Y values will have a value of 1, the most upper Y values will have a value of 0 and the all the rest will have values between 1 and 0.
In light blue the added components and below the final result:


The good thing about Grasshopper3D is that now you can play with sliders and even certain connections to generate whole new results in seconds! All these were done with the same script (actually the correct name is 'definition') you see on the picture above.
Have Fun!


– Ramiro Sena, generating from Argentina


I have been a regular visitor to the gaming site that hosts Wave Rider for quite some time now, and I am always amazed at how the platform continues to evolve and surprise me.
stickman hook The good thing about Grasshopper3D is that now you can play with sliders and even certain connections to generate whole new results in seconds!
Thank you for this insightful post on generative art with Grasshopper3D! cookie clicker I appreciate the detailed explanations. How do you see this approach evolving with new technologies in design?
mr flip is a physics-based 3D arcade game where you control Mr. Flip, a rag doll character, performing somersaults and landing perfectly on target areas.
Grasshopper3D is not just a technical tool for architects, but also a truly powerful platform for artistic creation. In particular, the ability to change parameters and see results immediately opens up a wealth of creative experimentation possibilities. This rule-based, variable based design approach is quite similar to the feel in fnaf, where every movement and outcome depends on the underlying logic and system state.